

本文详细阐述了zabbix6.0在centos8上面的整个部署过程,按照步骤流程操作即可成功安装zabbix6.0.
附centos8下载链接
1.
Date,查看系统时间,发现时间错误。
Timedatectl,查看系统时区设置,发现时区设置错误。
Timedatectl set-timezone Asia/Shanghai,更改时区为亚洲上海。
Date。再次查看系统时间,恢复正常。
![图片[1]-zabbix6.0安装部署教程-云计算运维](https://blog.ossq.cn/wp-content/uploads/2023/04/1-4.png "1.png")
2.
Systemctl stop firewalld.service 关掉防火墙(临时的)
Systemctl disable firewalld.service禁用防火墙(永久的)
Vi /etc/selinux/config将SELINUX的值修改为disabled,永久禁用selinux
Setenforce 0 临时禁用selinux
![图片[2]-zabbix6.0安装部署教程-云计算运维](https://blog.ossq.cn/wp-content/uploads/2023/04/2-6.png "2.png")
![图片[3]-zabbix6.0安装部署教程-云计算运维](https://blog.ossq.cn/wp-content/uploads/2023/04/3-5.png "3.png")
3.
安装zabbix仓库
rpm -Uvh https://repo.zabbix.com/zabbix/6.0/rhel/8/x86_64/zabbix-release-6.0-1.el8.noarch.rpm
dnf clean all
安装zabbix服务器、web前端和agent,遇到提示直接输入Y继续安装即可。
dnf install -y zabbix-server-mysql zabbix-web-mysql zabbix-apache-conf zabbix-sql-scripts zabbix-selinux-policy zabbix-agent![图片[4]-zabbix6.0安装部署教程-云计算运维](https://blog.ossq.cn/wp-content/uploads/2023/04/4-5.png "4.png")
![图片[5]-zabbix6.0安装部署教程-云计算运维](https://blog.ossq.cn/wp-content/uploads/2023/04/5-5.png "5.png")
4.
安装mariadb数据库,自带数据库版本较低,需设置额外安装源。
cat <<EOF > /etc/yum.repos.d/mariadb.repo
# MariaDB 10.6 CentOS repository list - created 2022-06-08 17:00 UTC
# https://mariadb.org/download/
[mariadb]
name = MariaDB
baseurl = https://mirrors.cloud.tencent.com/mariadb/yum/10.6/centos8-amd64
module_hotfixes=1
gpgkey=https://mirrors.cloud.tencent.com/mariadb/yum/RPM-GPG-KEY-MariaDB
gpgcheck=1
EOF
dnf install -y mariadb mariadb-server 安装数据库
![图片[6]-zabbix6.0安装部署教程-云计算运维](https://blog.ossq.cn/wp-content/uploads/2023/04/6-5.png "6.png")
5.
Systemctl enable mariadb数据库设置开机启动
Systemctl start mariadb启动数据库
Systemctl status mariadb查看数据库状态,active(running)表示启动正常。
![图片[7]-zabbix6.0安装部署教程-云计算运维](https://blog.ossq.cn/wp-content/uploads/2023/04/7-5.png "7.png")
6.
Mysql 登录数据库
create database zabbix character set utf8mb4 collate utf8mb4_bin; 新建zabbix数据库,字符编码格式为utf8
create user zabbix@localhost identified by 'password'; 创建用户名zabbix密码password
grant all privileges on zabbix.* to zabbix@localhost; 给用户zabbix授权
quit; 退出![图片[8]-zabbix6.0安装部署教程-云计算运维](https://blog.ossq.cn/wp-content/uploads/2023/04/8-4.png "8.png")
7.
导入初始架构和数据
zcat /usr/share/doc/zabbix-sql-scripts/mysql/server.sql.gz | mysql -uzabbix -p zabbix(回车后输入密码password)
![图片[9]-zabbix6.0安装部署教程-云计算运维](https://blog.ossq.cn/wp-content/uploads/2023/04/9-3.png "9.png")
Vi /etc/zabbix/zabbix_server.conf 将DBPassword的值修改为password,且将前面 # 去掉。
![图片[10]-zabbix6.0安装部署教程-云计算运维](https://blog.ossq.cn/wp-content/uploads/2023/04/10-2.png "10.png")
8.
systemctl restart zabbix-server zabbix-agent httpd php-fpm 重启所有服务。
systemctl enable zabbix-server zabbix-agent httpd php-fpm 设置开机启动。
![图片[11]-zabbix6.0安装部署教程-云计算运维](https://blog.ossq.cn/wp-content/uploads/2023/04/11-1.png "11.png")
9.
浏览器输入ip/zabbix进入zabbix安装界面。
发现一个警告,且语言无法选择中文,需要安装语言包。
You are not able to choose some of the languages, because locales for them are not installed on the web server.
(您无法选择某些语言,因为web服务器上没有安装这些语言的区域设置。)
![图片[12]-zabbix6.0安装部署教程-云计算运维](https://blog.ossq.cn/wp-content/uploads/2023/04/12-1.png "12.png")
![图片[13]-zabbix6.0安装部署教程-云计算运维](https://blog.ossq.cn/wp-content/uploads/2023/04/13-1.png "13.png")
10.
dnf install langpacks-zh_CN.noarch 安装中文语言包。
dnf install glibc-common 安装glibc-common识别语言包。
刷新网页,可显示中文。
![图片[14]-zabbix6.0安装部署教程-云计算运维](https://blog.ossq.cn/wp-content/uploads/2023/04/14-1.png "14.png")
必要条件检测,下一步。
![图片[15]-zabbix6.0安装部署教程-云计算运维](https://blog.ossq.cn/wp-content/uploads/2023/04/15-1.png "15.png")
配置数据库连接,密码是password,下一步。
![图片[16]-zabbix6.0安装部署教程-云计算运维](https://blog.ossq.cn/wp-content/uploads/2023/04/16.png "16.png")
配置zabbix主机名称,设置正确的时区,下一步。
![图片[17]-zabbix6.0安装部署教程-云计算运维](https://blog.ossq.cn/wp-content/uploads/2023/04/17.png "17.png")
安装前汇总,下一步。
![图片[18]-zabbix6.0安装部署教程-云计算运维](https://blog.ossq.cn/wp-content/uploads/2023/04/18.png "18.png")
安装完成。
![图片[19]-zabbix6.0安装部署教程-云计算运维](https://blog.ossq.cn/wp-content/uploads/2023/04/19.png "19.png")
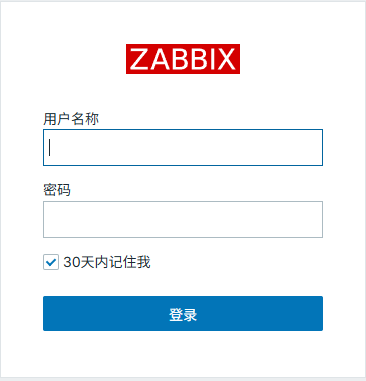
默认用户名Admin密码zabbix,登录。
![图片[20]-zabbix6.0安装部署教程-云计算运维](https://blog.ossq.cn/wp-content/uploads/2023/04/20.png "20.png")
11.
至此zabbix6.0安装部署完毕。
![图片[21]-zabbix6.0安装部署教程-云计算运维](https://blog.ossq.cn/wp-content/uploads/2023/04/21.png "21.png")


暂无评论内容